- Published on
[CI/CD] - CI pipelines with GitHub actions
- Authors

- David Nguyen
Table of Contents
1. What are we going to do?
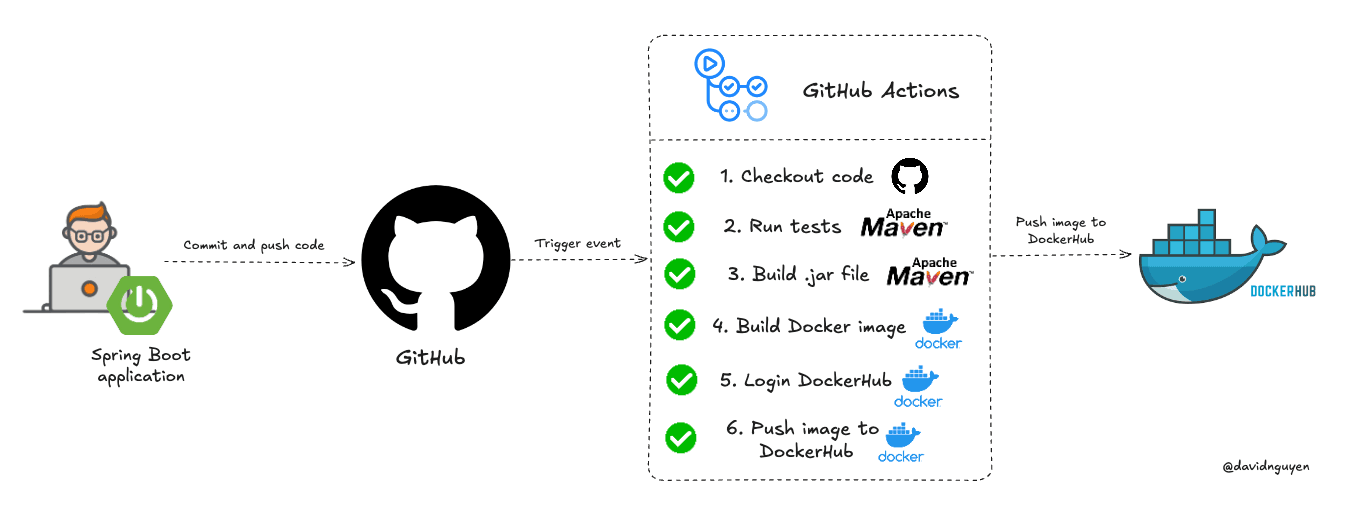
In this post, we will create a simple Spring Boot application and then use the GitHub actions for automatically build and create Docker image for the application.
Finally, we will push the created image to DockerHub and then run our application as Docker container based on that image.
This is the flow of our project:
2. Create a Spring Boot project
To focus on the main content of the article about CI/CD with GitHub Actions, you can create a simple Spring Boot application using https://start.spring.io/
The Spring Boot application will public an APIs with endpoint:
/api/v1/users/and return list of users as a JSON object.Find more details about the source code on my GitHub.
3. Write the files to define the pipelines.
Next, we need to create the necessary files to define the steps for GitHub Actions to follow in building and creating a Docker image from our source code.
In real projects, we often work with multiple environments when developing an application. In this post, I'll assume we have two environments: development and production.
Of course, we also have two Git branches:
devfor the development environment andmasterfor the production environment.To enable GitHub Actions to trigger our application, we need to create the following folder and files:
dev.yml,prod.yml
spring-boot-project/
│
├── .github/
│   └── workflows/
│       ├── dev.yml
│       └── prod.yml
│
├── src/
├── pom.xml
└── README.md
- Content of the
dev.yml:
name: CI pipeline - Development env # Name of the workflow. This will be shown in GitHub Actions interface.

on:
  push:
    branches:
      - dev # Trigger this workflow when there is a push to the 'dev' branch.

jobs:
  build-deploy: # Define a job named 'build-deploy'.
    name: Build and deploy with GitHub Actions # Name of the job, displayed in the GitHub Actions UI.
    runs-on: ubuntu-latest # Specify the type of runner to use (latest version of Ubuntu).

    steps:
      - name: Checkout code # Step to check out the repository's code.
        uses: actions/checkout@v4 # Uses the 'actions/checkout' action to pull the code from the repository.

      - name: Setup JDK 17 # Step to set up Java Development Kit (JDK) 17.
        uses: actions/setup-java@v3 # Uses the 'actions/setup-java' action to configure the Java environment.
        with:
          distribution: 'corretto' # Use the Corretto distribution of JDK.
          java-version: 17 # Set up JDK version 17.

      - name: Run tests # Step to run tests using Maven.
        run: mvn -B test --file pom.xml # Runs Maven in batch mode to execute tests defined in the 'pom.xml' file.

      - name: Build with Maven # Step to build the application using Maven.
        run: |
          mvn -B package --file pom.xml  # Runs Maven in batch mode to package the application as defined in the 'pom.xml' file.
- Content of the
prod.yml:
name: CI pipeline - Product env # Name of the workflow. This will be shown in GitHub Actions interface.

on:
  push:
    branches:
      - master # Trigger this workflow when there is a push to the 'master' branch.

jobs:
  build-deploy: # Define a job named 'build-deploy'.
    name: Build and deploy with GitHub Actions # Name of the job, displayed in the GitHub Actions UI.
    runs-on: ubuntu-latest # Specify the type of runner to use (latest version of Ubuntu).

    steps:
      - name: Checkout code # Step to check out the repository's code.
        uses: actions/checkout@v4 # Uses the 'actions/checkout' action to pull the code from the repository.

      - name: Setup JDK 17 # Step to set up Java Development Kit (JDK) 17.
        uses: actions/setup-java@v3 # Uses the 'actions/setup-java' action to configure the Java environment.
        with:
          distribution: 'corretto' # Use the Corretto distribution of JDK.
          java-version: 17 # Set up JDK version 17.

      - name: Build with Maven # Step to build the application using Maven.
        run: |
          mvn clean package -DskipTests  # Runs Maven to clean and package the application, skipping tests.
As you can see, in
dev.ymlI used thedevbranch, and inprod.ymlI used theprodbranch.n the development environment, I use Maven to run tests and build the application. However, in the production environment, I use Maven only for building and skip the tests.
=> This approach assumes that if the application works correctly in the development environment, it should also work fine in the production environment.
4. Test the pipelines.
- To test the pipelines, push your code to a GitHub repository and navigate to the Actions tab in that repository.
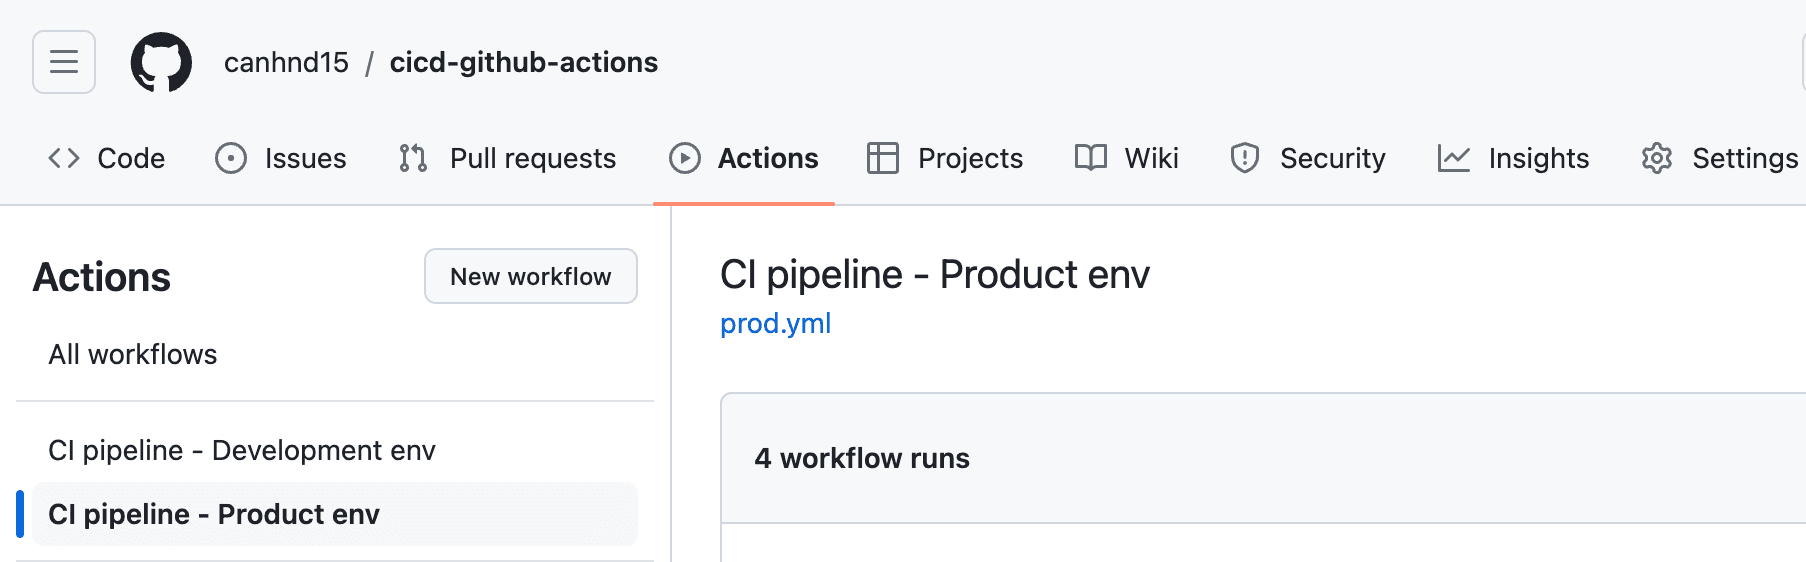
GitHub Actions will scan all files in the
workflowsdirectory and trigger the appropriate workflow based on the push event for the specific branch.For example, when you push code to the
devbranch, GitHub Actions will run the pipeline defined indev.ymlfor changes on thedevbranch.
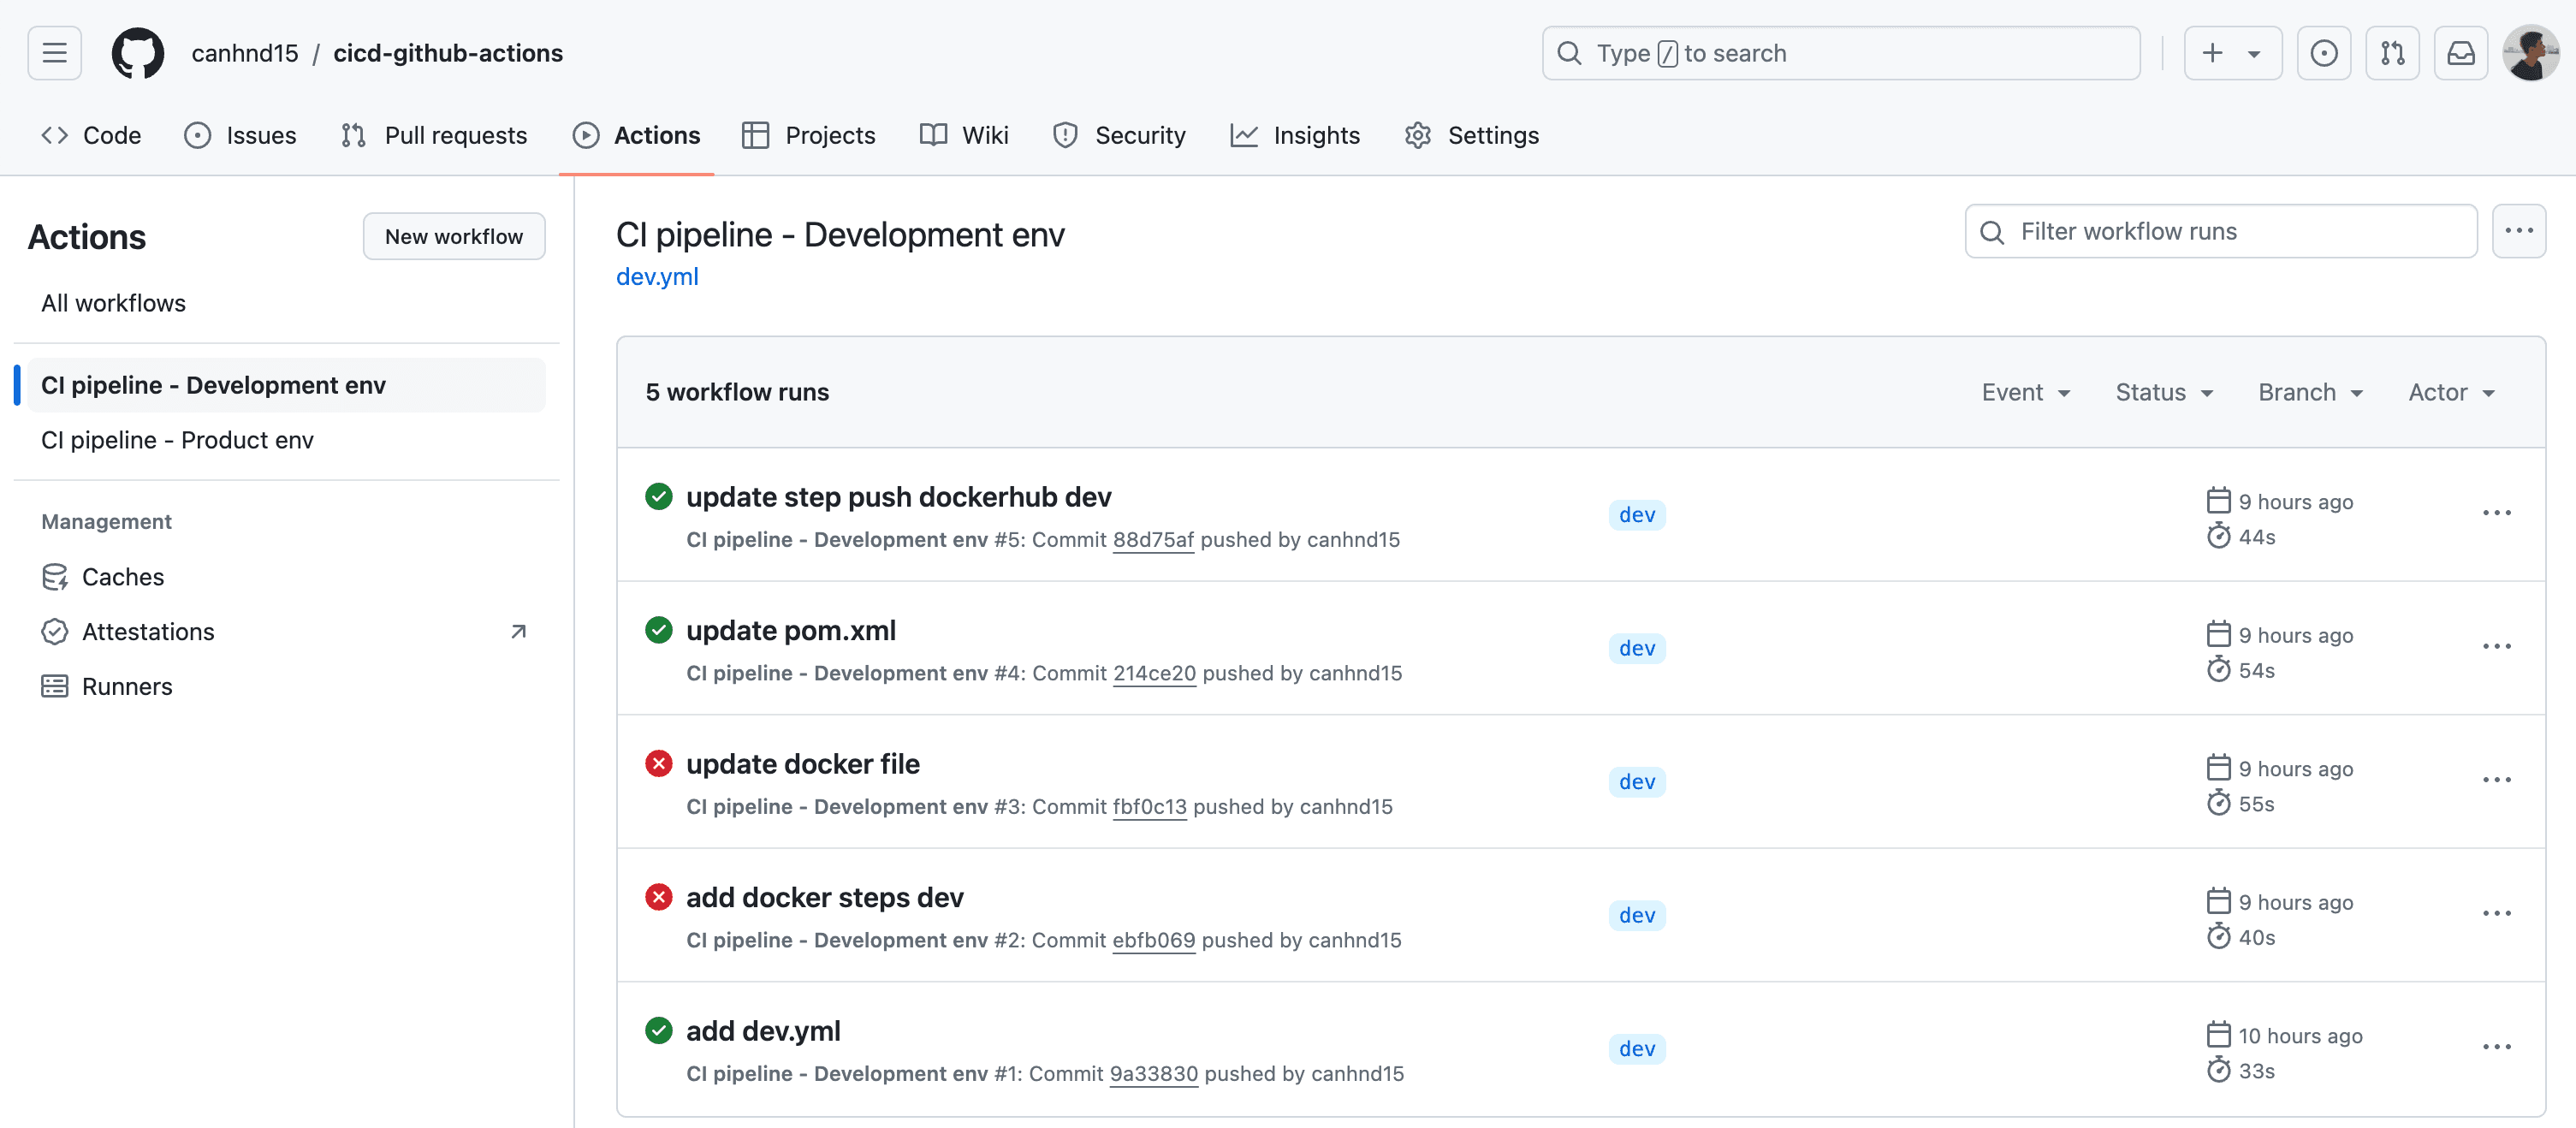
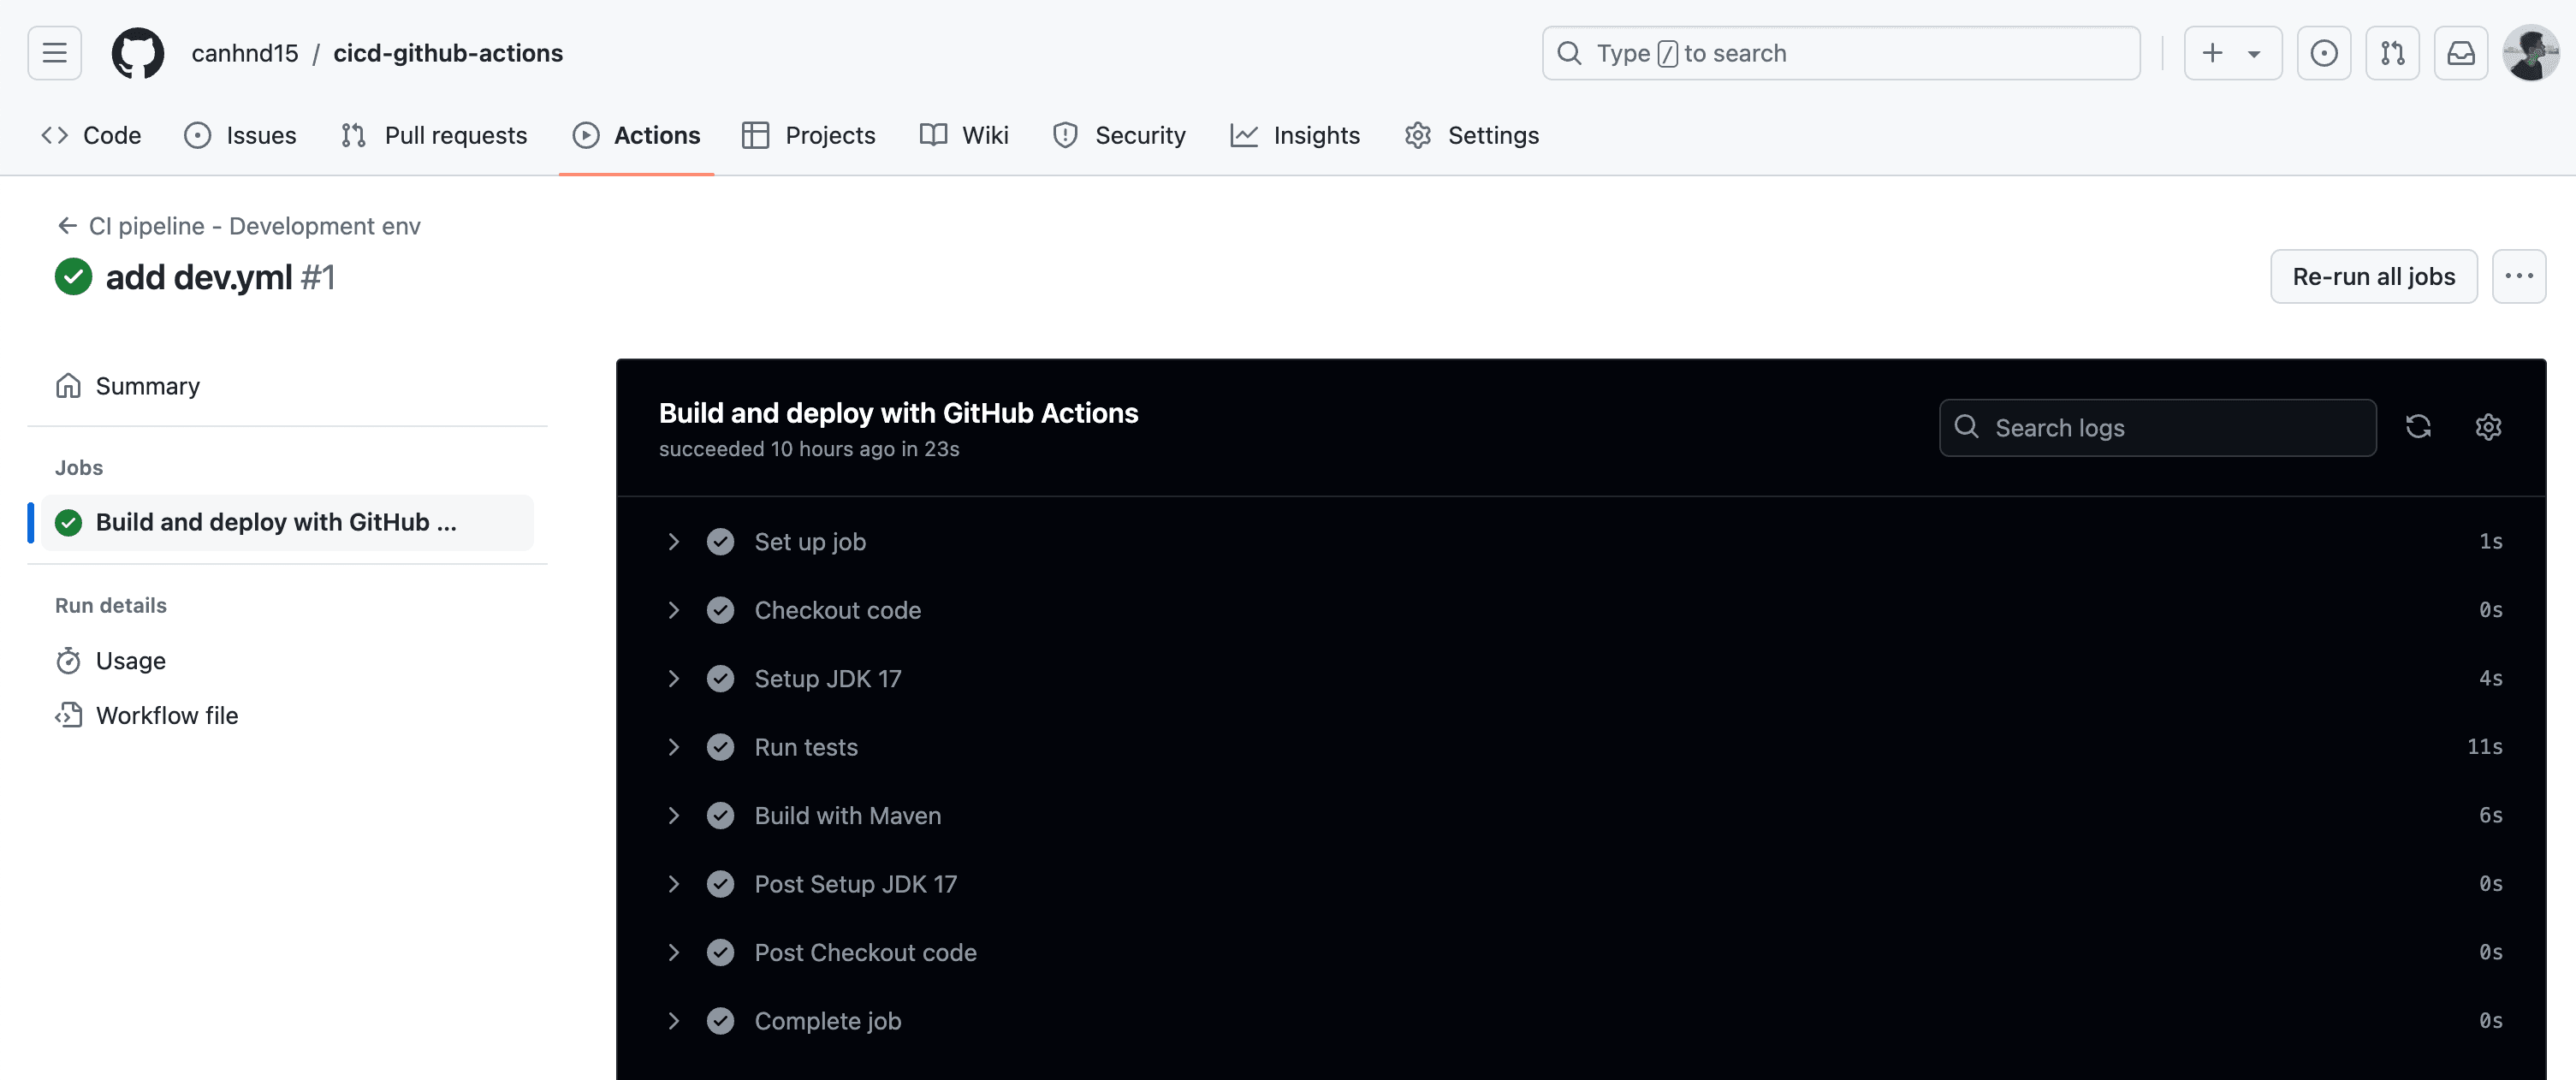
- Here is an example of steps when we build and deploy successfully with GitHub Actions.
5. Add Docker steps.
5.1 - Dockerfile
Now that our pipelines are working correctly, we'll add Docker steps to build an image and push it to Docker.
To build a Docker image from our application, we need a Dockerfile that defines the steps for running a Spring Boot application by executing a .jar file.
Here is our Dockerfile (make sure to push it to all branches of the repository).
FROM openjdk:17-jdk

WORKDIR /app

COPY target/cicd-demo-*.jar /app/cicd-demo.jar

EXPOSE 8090

CMD ["java", "-jar", "cicd-demo.jar"]
=> Note that you may need to modify this Dockerfile to suit your specific application.
5.2 - Docker steps for the pipelines
We have three Docker steps: building a Docker image, logging in to DockerHub, and then pushing the image to DockerHub.
Before defining the steps, we need to create DockerHub secret information and add it to our GitHub repository. This will allow our GitHub Actions workflow to communicate with DockerHub.
=> 1. Login to your DockerHub account -> Settings -> Personal access token.
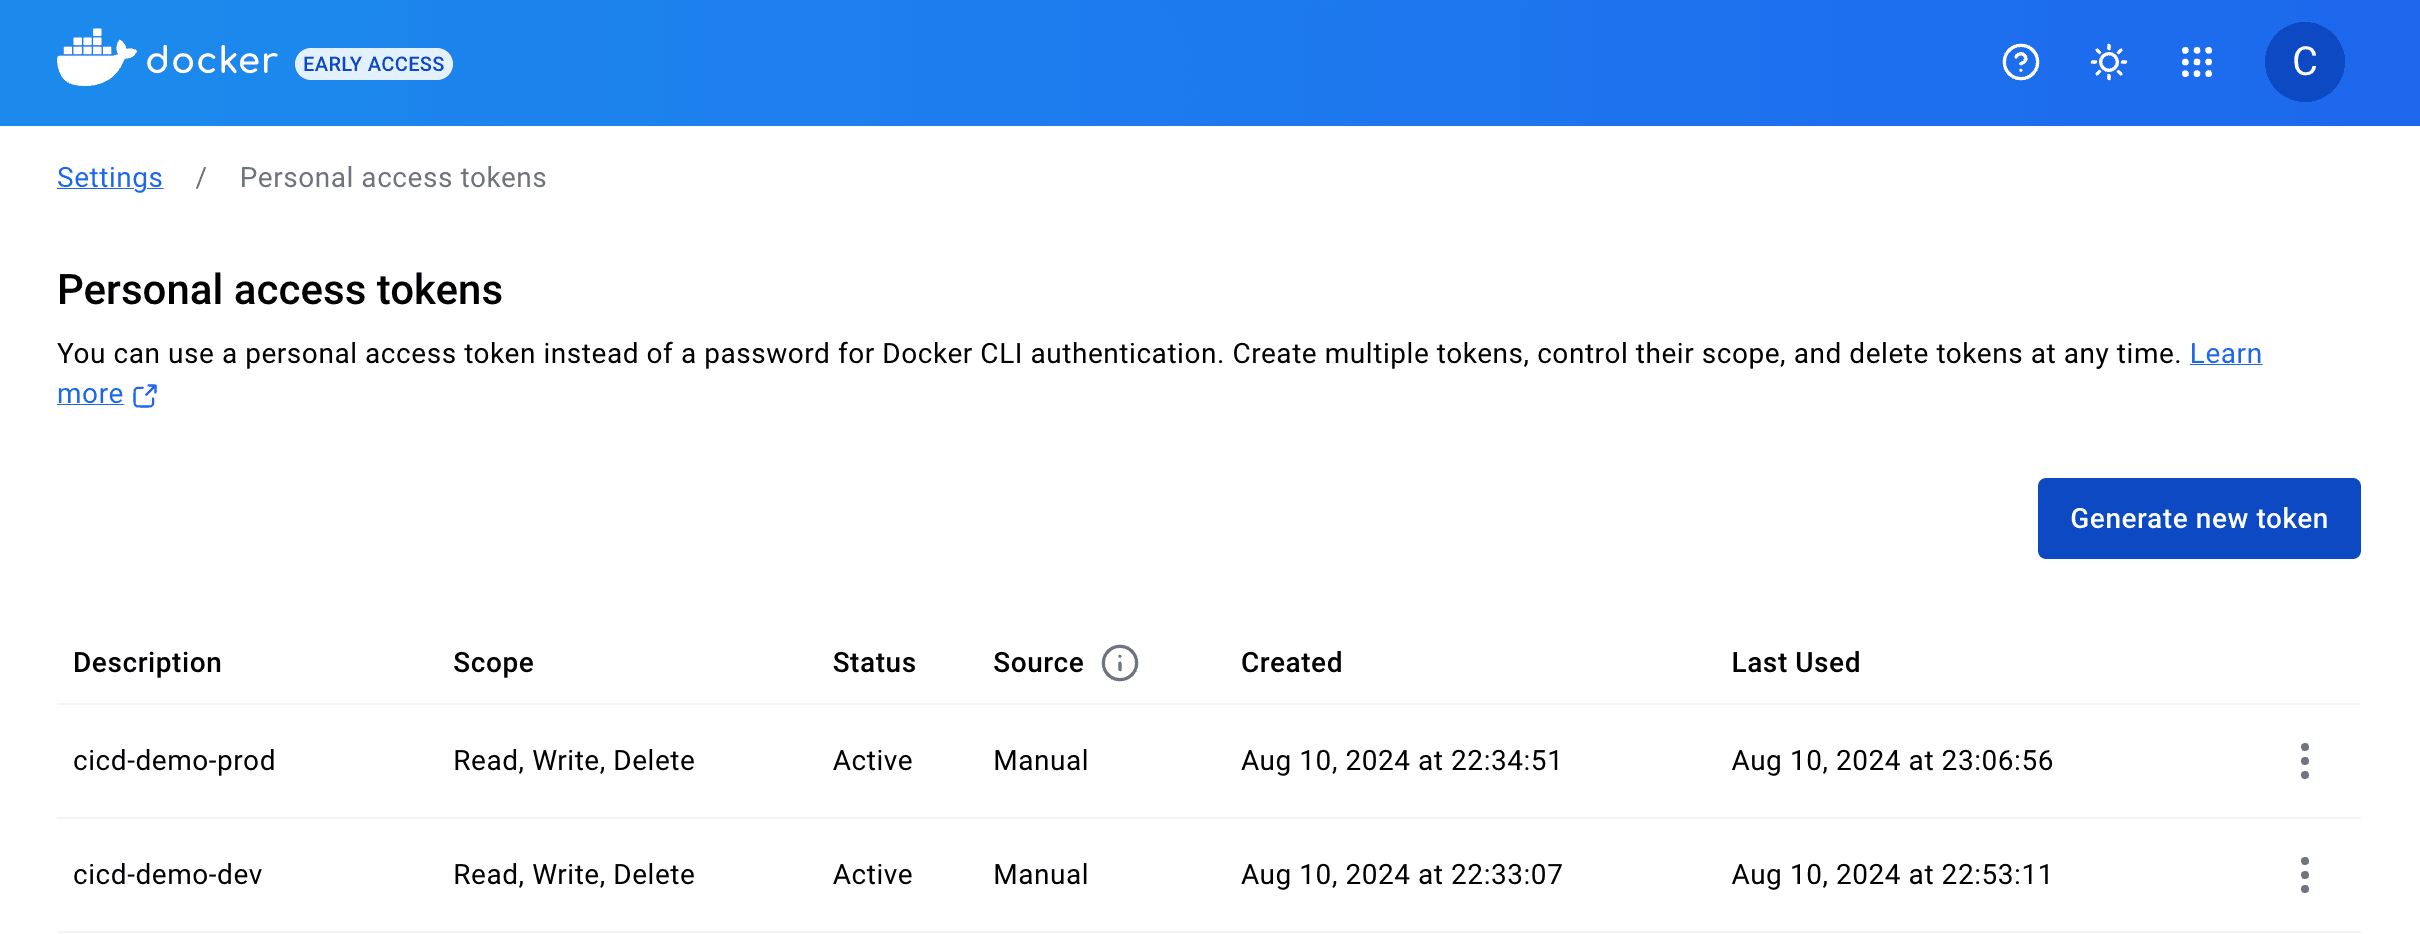
=> 2. Generate new access token.
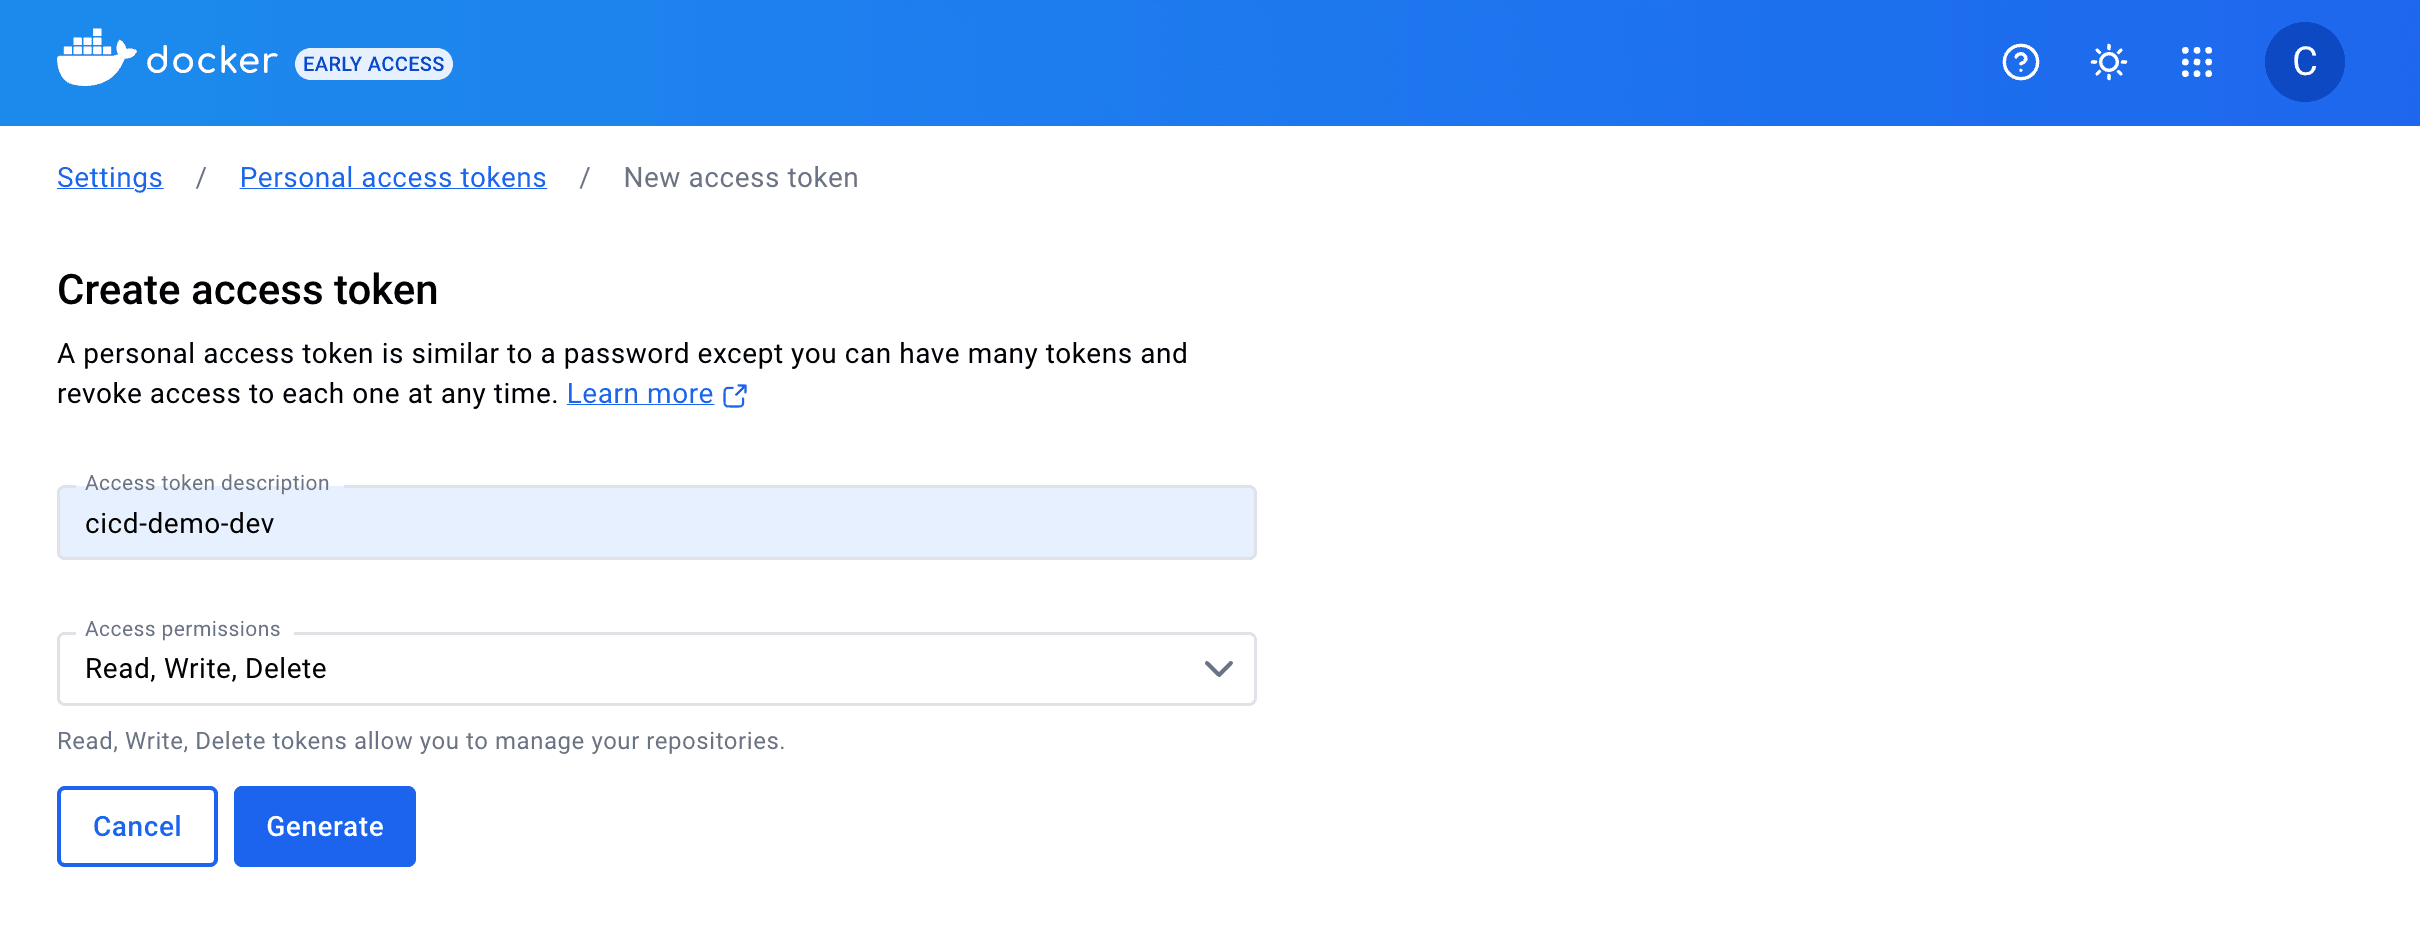
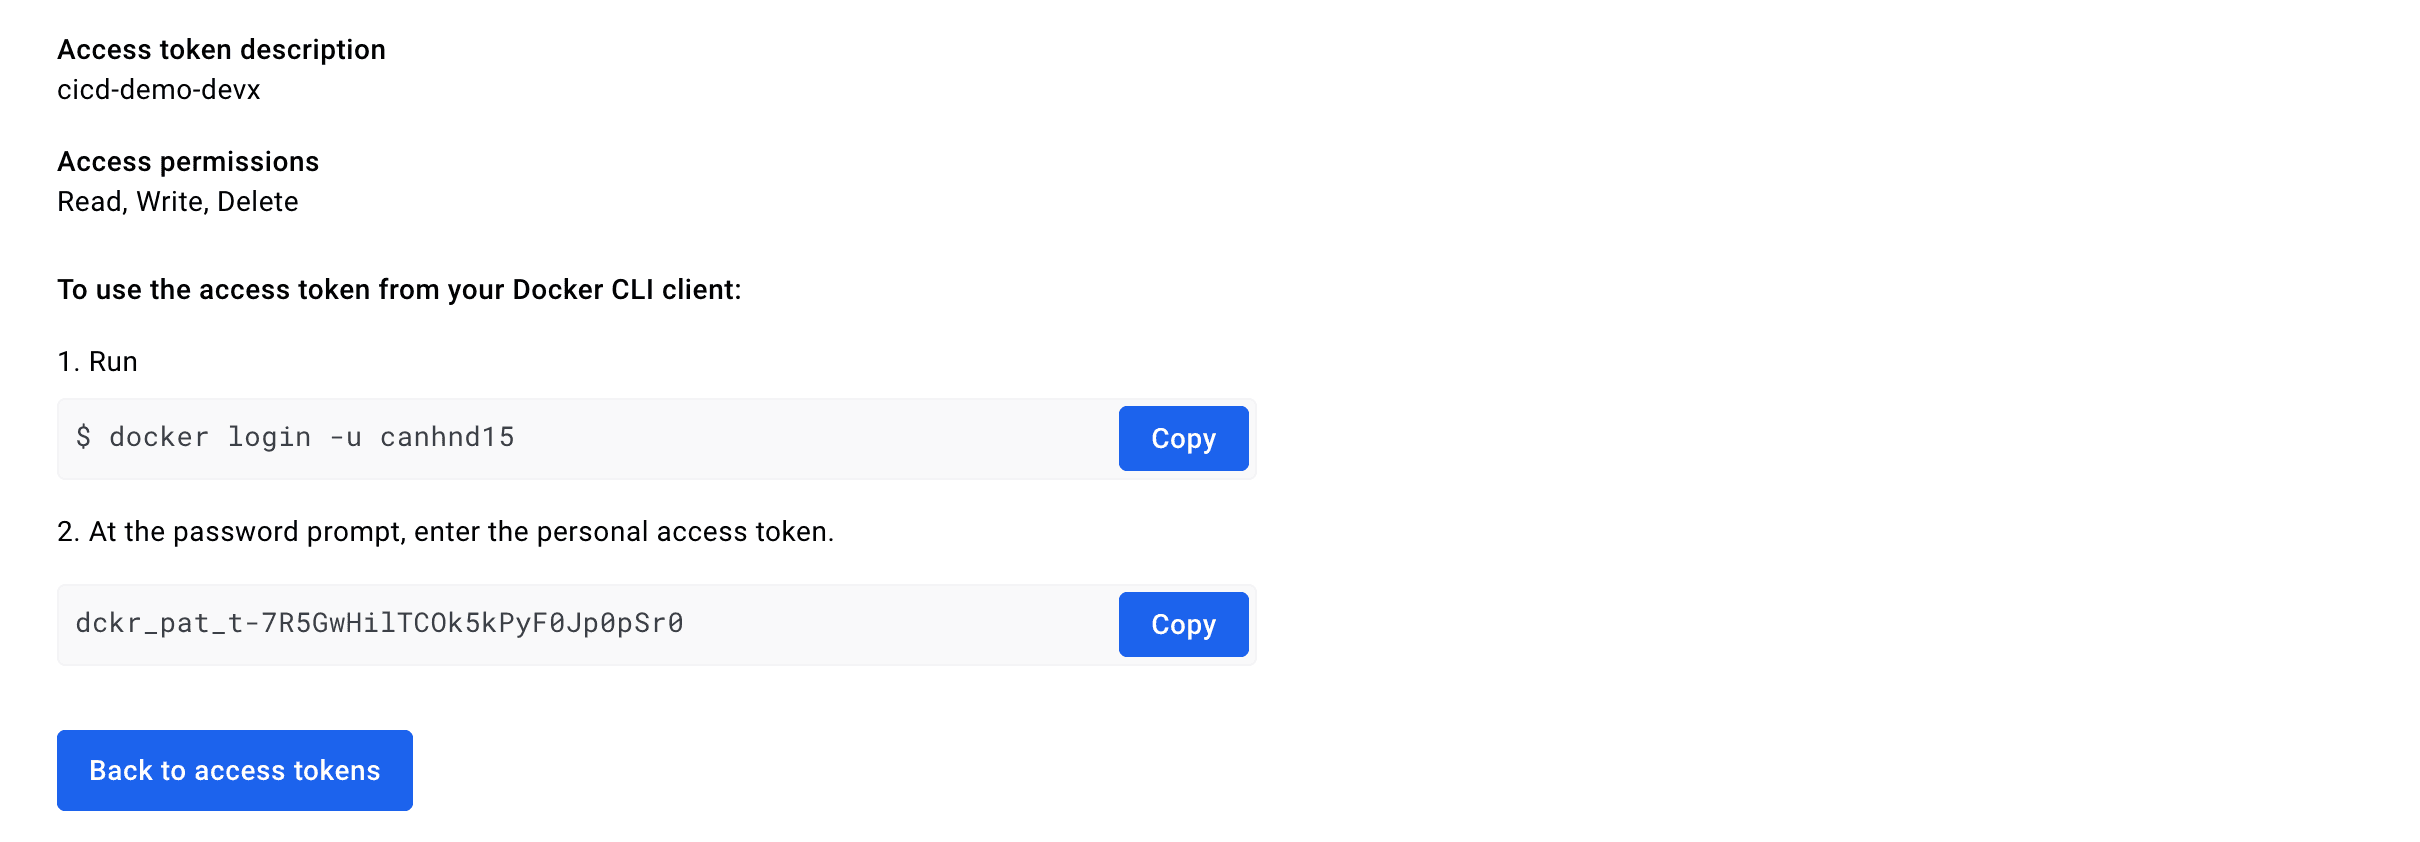
=> 3. Copy the access token.
=> 4. Navigate to the Settings tab on you github repository -> Secrets and variables -> Actions
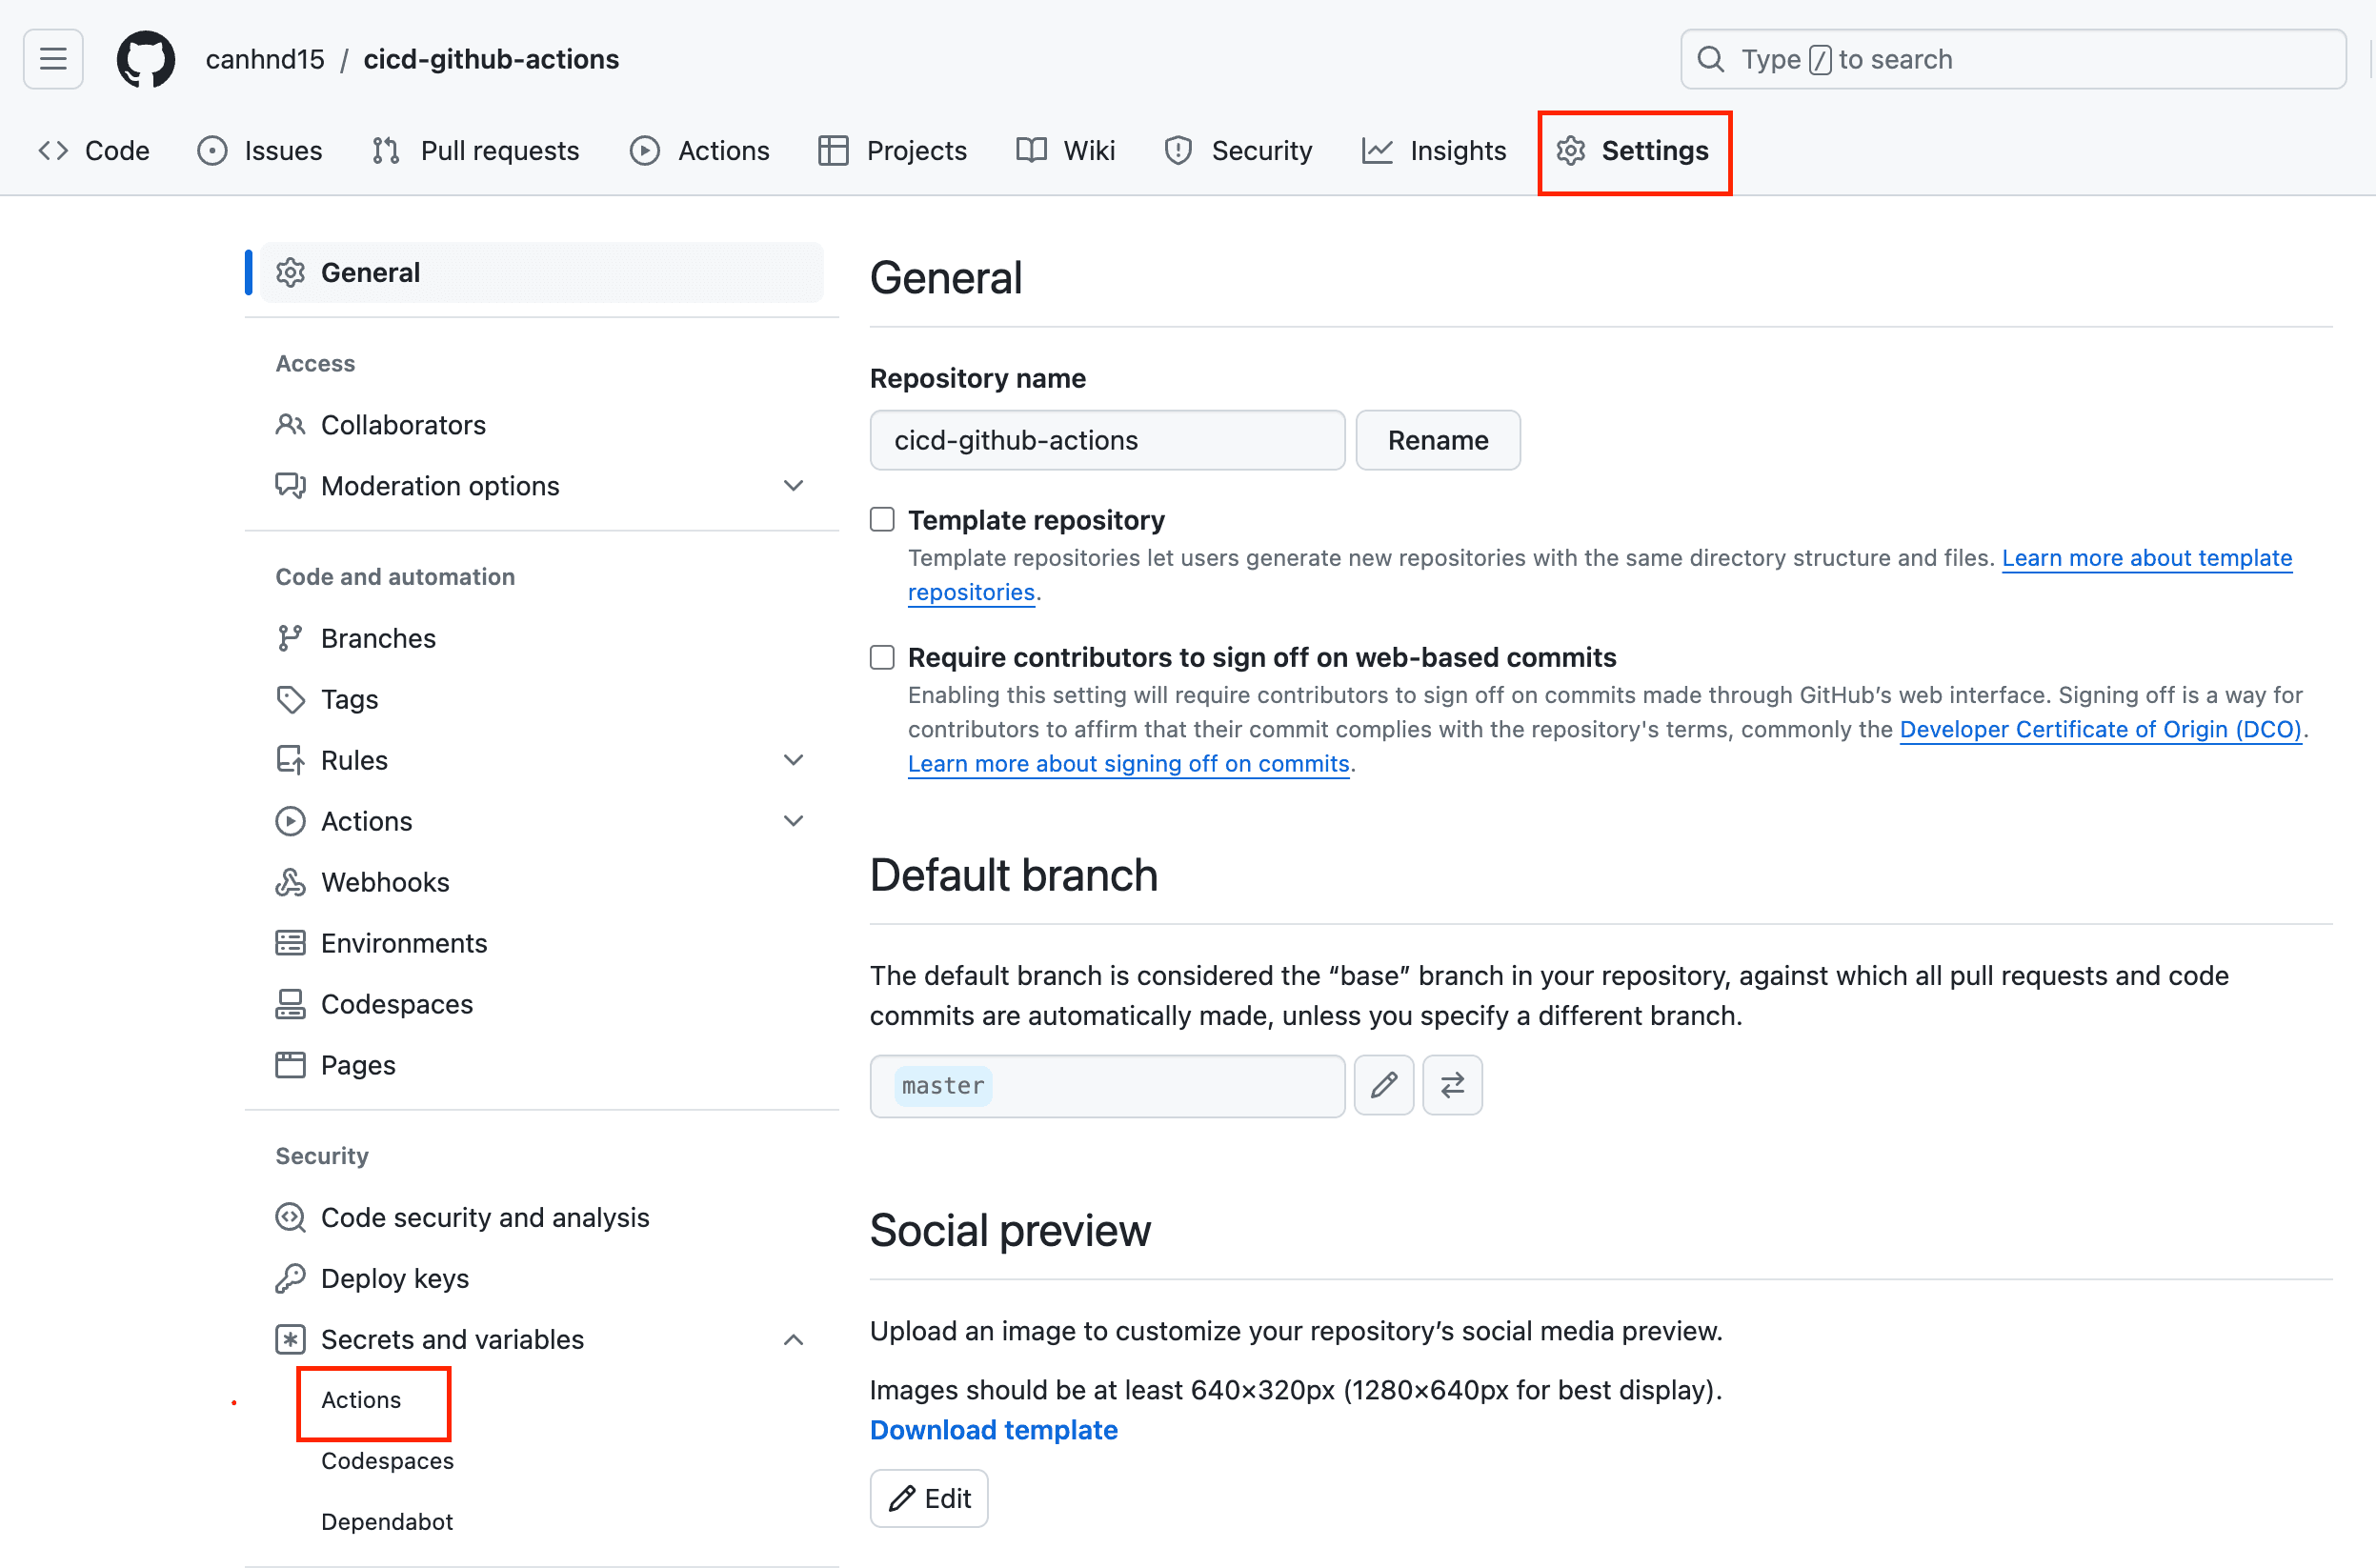
=> 5. Create new repository secret.
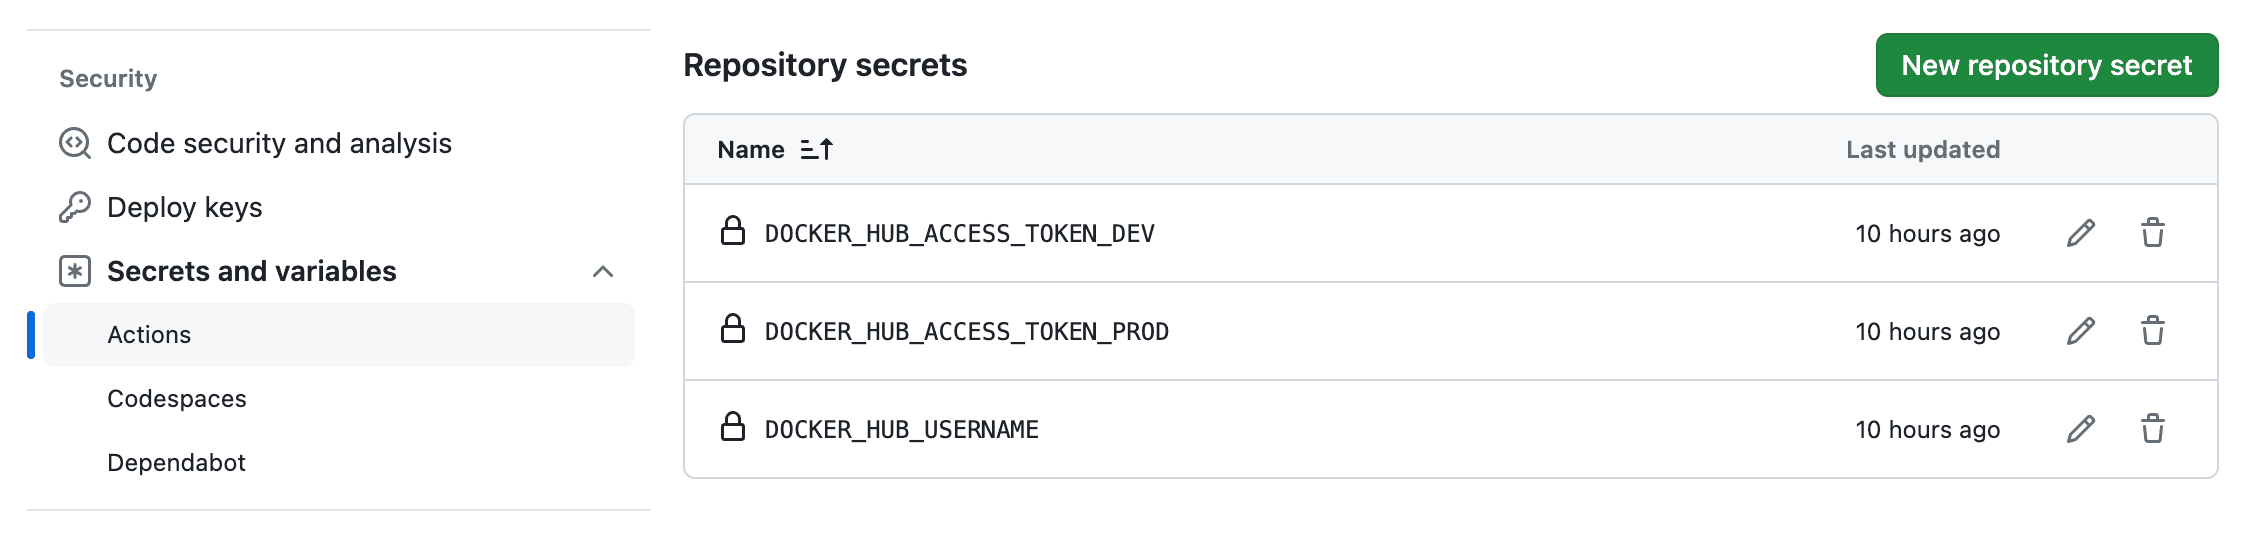
- After adding the secrets, we will modify the
dev.ymlandprod.ymlfiles to include the Docker steps.
=> dev.yml for development environment.
name: CI pipeline - Development env

on:
  push:
    branches:
      - dev

jobs:
  build-deploy:
    name: Build and deploy with GitHub Actions
    runs-on: ubuntu-latest

    steps:
      - name: Checkout code
        uses: actions/checkout@v4

      - name: Setup JDK 17
        uses: actions/setup-java@v3
        with:
          distribution: 'corretto'
          java-version: 17

      - name: Run tests
        run: mvn -B test --file pom.xml

      - name: Build with Maven
        run: |
          echo "Build on dev environment"
          mvn -B package --file pom.xml

      # Define step for building Docker image based on Dockerfile
      - name: Build Docker image
        uses: docker/build-push-action@v2
        with:
          context: .
          dockerfile: Dockerfile
          push: false
          tags: ${{ secrets.DOCKER_HUB_USERNAME }}/cicd-demo:1.0.0

      # Define step for logging DockerHub
      - name: Login to DockerHub
        uses: docker/login-action@v1
        with:
          username: ${{ secrets.DOCKER_HUB_USERNAME }}
          password: ${{ secrets.DOCKER_HUB_ACCESS_TOKEN_DEV }}

      # Define step for pushing image to the DockerHub
      - name: Push image to DockerHub
        uses: docker/build-push-action@v2
        with:
          context: .
          dockerfile: Dockerfile
          push: true
          tags: ${{ secrets.DOCKER_HUB_USERNAME }}/cicd-demo:1.0.0
=> prod.yml for production environment.
name: CI pipeline - Product env

on:
  push:
    branches:
      - master

jobs:
  build-deploy:
    name: Build and deploy with GitHub Actions
    runs-on: ubuntu-latest

    steps:
      - name: Checkout code
        uses: actions/checkout@v4

      - name: Setup JDK 17
        uses: actions/setup-java@v3
        with:
          distribution: 'corretto'
          java-version: 17

      - name: Build with Maven
        run: |
          echo "Build on product environment"
          mvn clean package -DskipTests

      # Define step for building Docker image based on Dockerfile
      - name: Build Docker image
        uses: docker/build-push-action@v2
        with:
          context: .
          dockerfile: Dockerfile
          push: false
          tags: ${{ secrets.DOCKER_HUB_USERNAME }}/cicd-demo-prod:1.0.0

      # Define step for logging DockerHub
      - name: Login to DockerHub
        uses: docker/login-action@v1
        with:
          username: ${{ secrets.DOCKER_HUB_USERNAME }}
          password: ${{ secrets.DOCKER_HUB_ACCESS_TOKEN_PROD }}

      # Define step for pushing image to the DockerHub
      - name: Push image to DockerHub
        uses: docker/build-push-action@v2
        with:
          context: .
          dockerfile: Dockerfile
          push: true
          tags: ${{ secrets.DOCKER_HUB_USERNAME }}/cicd-demo-prod:1.0.0
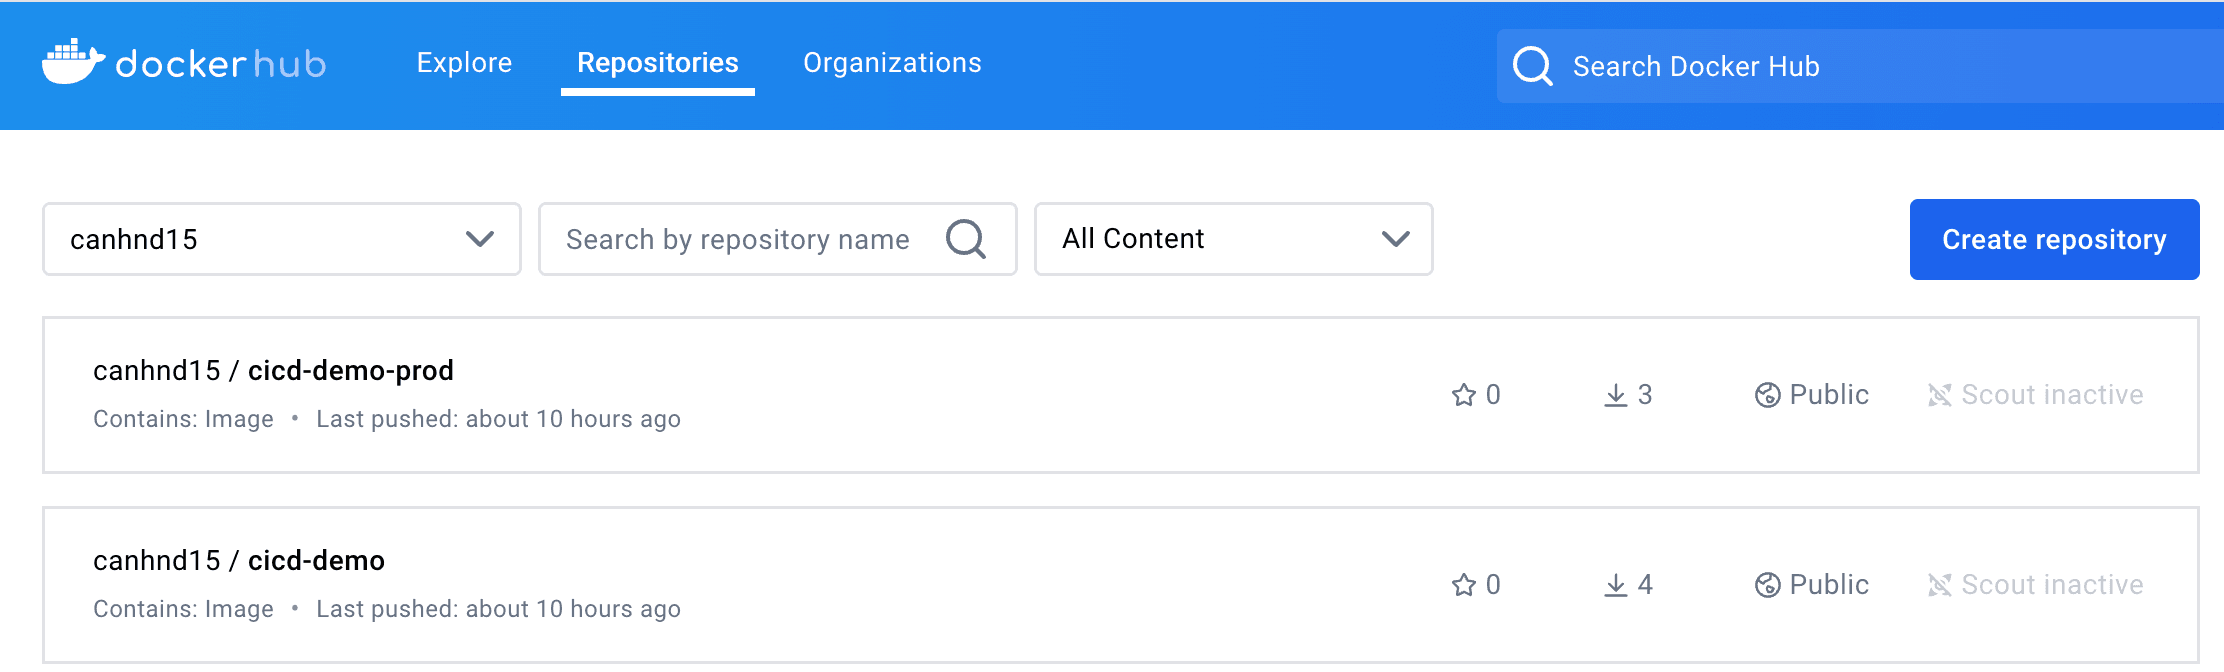
=> Now push the code to GitHub and test whether the pipelines in the development and production environments are working correctly.
- If everything is fine, you will see that our Docker images have been pushed to DockerHub.
6. Running application as Docker container.
- To run the application based on created image as Docker container you run the following commands.
=> This for product environment:
docker run --name cicd-demo-prod -d -p 8090:8090 canhnd15/cicd-demo-prod:1.0.0
=> Or this for develop environment:
docker run --name cicd-demo-dev -d -p 8090:8090 canhnd15/cicd-demo:1.0.0
- Once all the containers are running, you can make an HTTP request to test the application. For example:
=> Request:
curl http://localhost:8090/api/v1/users/
=> Response:
{"message":"get users successfully!","code":100,"response":[{"firstName":"firstname 0","lastName":"lastname 0","username":"username 0","email":"email_0@gmail.com"},{"firstName":"firstname 1","lastName":"lastname 1","username":"username 1","email":"email_1@gmail.com"},{"firstName":"firstname 2","lastName":"lastname 2","username":"username 2","email":"email_2@gmail.com"},{"firstName":"firstname 3","lastName":"lastname 3","username":"username 3","email":"email_3@gmail.com"},{"firstName":"firstname 4","lastName":"lastname 4","username":"username 4","email":"email_4@gmail.com"},{"firstName":"firstname 5","lastName":"lastname 5","username":"username 5","email":"email_5@gmail.com"},{"firstName":"firstname 6","lastName":"lastname 6","username":"username 6","email":"email_6@gmail.com"},{"firstName":"firstname 7","lastName":"lastname 7","username":"username 7","email":"email_7@gmail.com"},{"firstName":"firstname 8","lastName":"lastname 8","username":"username 8","email":"email_8@gmail.com"},{"firstName":"firstname 9","lastName":"lastname 9","username":"username 9","email":"email_9@gmail.com"}]}
7. Summary.
In this post, we explored how to use GitHub Actions to create an CI pipeline for building and deploying our Spring Boot application. Although this project is a simple demo, it provides a fundamental understanding for beginners and is easy to develop. I hope you find it helpful and that you learn something valuable from it!
See you in the next posts. Happy Coding!